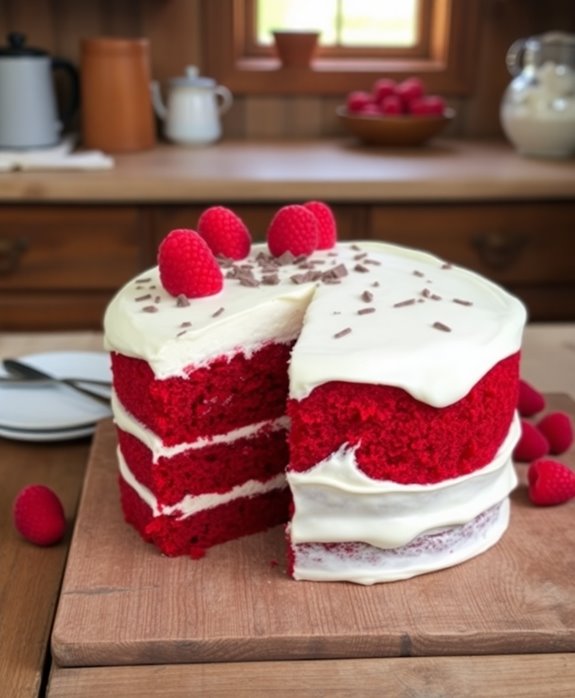
You're in for a treat with this classic Southern Red Velvet Cake. Start by mixing your dry ingredients—flour, sugar, and a bit of cocoa for depth. Whisk buttermilk, eggs, oil, vanilla, and vibrant red food coloring for the wet mix. Apple cider vinegar and baking soda create the perfect rise, making the cake fluffy and moist. Bake at 350°F for about 25 minutes until a toothpick comes out clean. Once cooled, frost with creamy, rich cream cheese frosting. Each slice tantalizes with balanced sweetness and tang. Ready to create this indulgent treat and impress any crowd? It's easier than you think.
Key Components: Buttermilk, Cocoa
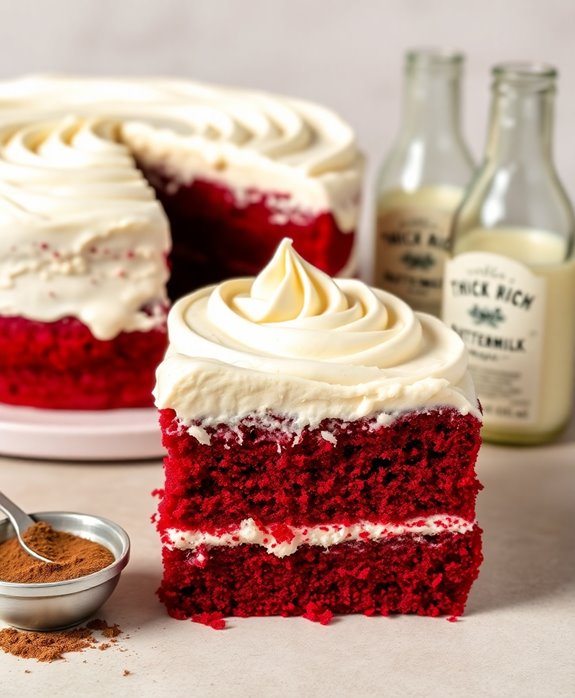
A successful red velvet cake hinges on two essential ingredients: buttermilk and cocoa. When you're aiming for that perfect taste and texture, these components are non-negotiable.
Buttermilk imparts a subtle tanginess and tenderness to the cake, making it moist and rich. The cocoa adds depth and flavor without overpowering the cake's signature red color. Together, they create a balanced, unforgettable dessert.
Here's why these ingredients matter:
- Flavor Balance: Buttermilk and cocoa enhance each other's flavors.
- Moisture: Buttermilk keeps the cake moist and soft.
- Texture: Cocoa contributes to a velvety crumb.
- Color Contrast: A small amount of cocoa provides the distinct red hue.
- Traditional Taste: These ingredients are core to authentic red velvet.
Master these elements, and your cake will shine.
Essential Ingredient: Apple Cider Vinegar
You mightn't expect apple cider vinegar to be essential in a red velvet cake, but it plays a key role.
It enhances the cake's moist texture and balances the sweetness with a subtle tang.
Plus, when combined with baking soda, it boosts the leavening process, giving your cake that perfect rise.
Enhancing Cake's Moist Texture
For an irresistibly moist red velvet cake, apple cider vinegar is your secret weapon. When you combine it with baking soda, a chemical reaction occurs, creating bubbles that help your cake rise beautifully.
This reaction also contributes to the cake's tender crumb, ensuring each bite melts in your mouth. Don't worry about any lingering vinegar taste; it's subtle and enhances the cake's overall texture without overpowering the flavor.
To use apple cider vinegar effectively, mix it with the wet ingredients before adding to the dry ones. This helps distribute it evenly throughout the batter.
Be sure to measure accurately; too much can affect the balance of your cake. With this simple addition, you'll achieve a moist, luscious red velvet cake every time.
Balancing Sweetness and Tang
Apple cider vinegar's unique tang is the key to striking the perfect balance between sweetness and acidity in a red velvet cake. When you add it, you're not just enhancing flavors; you're creating a harmonious blend that makes each bite memorable.
The vinegar subtly cuts through the sweetness, preventing your cake from being overly sugary. You'll notice that its slight acidity complements the richness of the cocoa, enhancing the overall taste profile.
To achieve this balance, measure your apple cider vinegar carefully. A little goes a long way, ensuring you don't overpower the other ingredients.
Boosting Baking Soda Reaction
A significant step in achieving a perfect red velvet cake lies in boosting the baking soda reaction with apple cider vinegar.
As you mix your ingredients, you'll want to guarantee this combination is just right. The vinegar acts as an acid, enhancing the leavening power of baking soda, which results in a cake that's light and fluffy.
Start by adding the vinegar to your wet ingredients, allowing it to react quickly with the baking soda when combined with the dry mix. This reaction creates carbon dioxide bubbles, which help the cake rise beautifully.
Don't skip this step, as it's essential for the cake's signature texture. Use fresh apple cider vinegar for the best results, making sure it complements the other flavors perfectly.
Step-by-Step Instructions
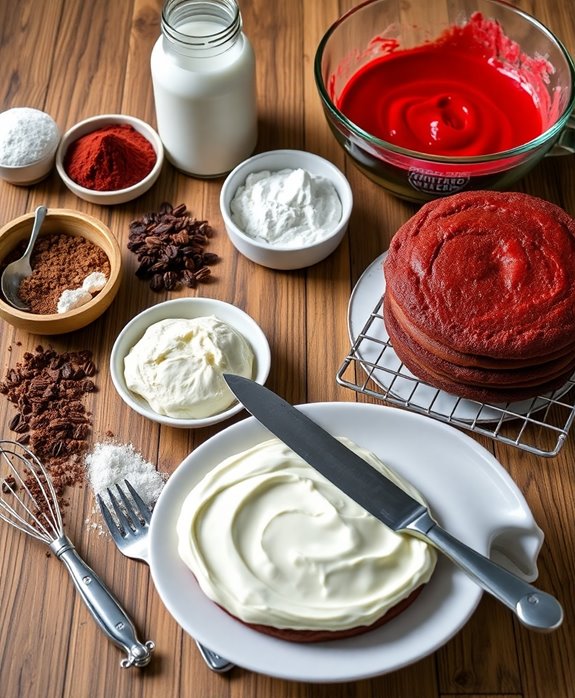
Red Velvet Cake Recipe
Step-by-Step Instructions
- Preheat the Oven
- Action: Set your oven to 350°F (175°C) to preheat.
- Tools Needed: Oven.
- Tip: Verify the oven rack is positioned in the center to allow even baking.
- Prepare the Cake Pans
- Action: Grease two 9-inch round cake pans and line them with parchment paper.
- Tools Needed: Cake pans, parchment paper, butter or non-stick spray.
- Tip: Trim the parchment paper to fit the bottom of the pan for easy removal of the cake.
- Mix the Dry Ingredients
- Action: In a medium bowl, sift together 2 1/2 cups of all-purpose flour, 1 1/2 cups of granulated sugar, 1 teaspoon of baking powder, 1 teaspoon of salt, and 1 tablespoon of unsweetened cocoa powder.
- Tools/Ingredients Needed: Medium bowl, sifter, measuring cups/spoons.
- Tip: Sifting the cocoa powder helps to avoid lumps in your batter.
- Combine the Wet Ingredients
- Action: In a large bowl, whisk together 1 cup of buttermilk, 2 large eggs, 1 cup of vegetable oil, 1 teaspoon of vanilla extract, and 2 tablespoons of red food coloring.
- Tools/Ingredients Needed: Large mixing bowl, whisk, measuring cups/spoons.
- Tip: Use gel food coloring for a more vibrant cake color.
- Mix the Batter
- Action: Gradually add the dry ingredients to the wet ingredients, mixing until just combined.
- Tools Needed: Spatula or electric mixer.
- Tip: Don't overmix; it can make the cake dense. Mix until there are no visible streaks of flour.
- Add the Vinegar and Baking Soda
- Action: In a small bowl, mix 1 teaspoon of baking soda with 1 teaspoon of white vinegar, then gently fold it into the batter.
- Tools/Ingredients Needed: Small bowl, spatula.
- Tip: This reaction helps the cake rise and adds to its light texture.
- Pour Batter into Pans
- Action: Divide the batter evenly between the prepared cake pans.
- Tools Needed: Spatula.
- Tip: Tap the pans gently on the counter to remove any air bubbles.
- Bake the Cakes
- Action: Place the pans in the preheated oven and bake for 25-30 minutes.
- Tip: Check for doneness by inserting a toothpick into the center; it should come out clean.
- Cool the Cakes
- Action: Allow the cakes to cool in the pans for 10 minutes, then remove them from the pans and place them on a wire rack to cool completely.
- Tools Needed: Wire rack.
- Tip: Wait until cakes are completely cool before frosting to prevent the frosting from melting.
- Prepare the Frosting
- Action: In a bowl, beat together 8 ounces of cream cheese, 1/2 cup of unsalted butter, 4 cups of powdered sugar, and 1 teaspoon of vanilla extract until smooth.
- Tools/Ingredients Needed: Mixing bowl, electric mixer.
- Tip: For a fluffier frosting, beat on high speed for an extra 2-3 minutes.
- Frost the Cake
- Action: Spread a layer of frosting on top of one of the cakes, stack the second cake on top, and frost the top and sides.
- Tools Needed: Offset spatula or knife.
- Tip: For a smooth finish, dip the spatula in warm water and shake off the excess before spreading the frosting.
- Serve and Enjoy
- Action: Slice the cake and serve.
- Tip: For cleaner slices, use a sharp knife and wipe it clean between cuts.
Enjoy your homemade red velvet cake!
Gather Necessary Baking Tools
To kick off your red velvet cake-making adventure, you'll need to assemble a collection of essential baking tools. Start with a set of measuring cups and spoons for precise ingredient portions.
Grab a mixing bowl, preferably large, to accommodate your batter comfortably. You'll also need a hand mixer or stand mixer to blend your ingredients smoothly. Don't forget a rubber spatula, perfect for scraping down the sides of the bowl. Have a sifter on hand to aerate your dry ingredients, ensuring a light, fluffy cake.
Next, prepare two 9-inch round cake pans. Greasing and lining them with parchment paper will prevent sticking.
Baking at 350°F
Once your tools are ready, preheat your oven to 350°F, ensuring a steady temperature for even baking.
While the oven heats, prepare your cake batter. Carefully measure and mix the dry ingredients in one bowl and the wet ingredients in another. Gradually combine them, making sure the batter is smooth without lumps.
Grease and flour your cake pans to prevent sticking, then divide the batter evenly between them. Tap the pans lightly on the counter to eliminate air bubbles.
Place the pans in the oven, ensuring they're centered on the middle rack for ideal heat circulation. Bake for 25-30 minutes, checking for doneness by inserting a toothpick into the center—it should come out clean.
Let the cakes cool before frosting.
Calorie Count Per Slice
Understanding the calorie count of a red velvet cake slice is essential for those mindful of their dietary intake. When you bake this Southern favorite, each slice typically contains about 250-400 calories, depending on the ingredients and portion size. Keeping track of these calories can help you enjoy this treat without overindulging.
Here's a quick breakdown of the calorie components:
| Component | Calories per Slice | Percentage of Total |
|---|---|---|
| Cake Base | 180 | 45% |
| Cream Cheese Frosting | 150 | 37.5% |
| Red Food Coloring | 20 | 5% |
Conclusion
As you savor each bite of your red velvet creation, imagine yourself on a journey through the vibrant landscapes of the South, where tradition and flavor dance like old friends. The buttermilk and cocoa blend seamlessly, just as the sun sets over rolling hills. Apple cider vinegar is the secret handshake, binding all elements together. Each calorie is a reminder of the warmth and hospitality of Southern kitchens, inviting you to return for another slice of this culinary story.
